Tuesday, August 18, 2015

Man's Best Friend

Tate will be FOUR next month! Of course, we adopted him shortly after we were married, so that means it's been that many years for us, too. Crazy how time flies.


When he was a puppy, his fur was darker and his head was black. Now look at how light his fur is. He is a very loving puppy dog, and I'm glad he's able to road trip and hang out with me when no one else is able to do so. Happy early birthday to my buddy!

Saturday, May 2, 2015

Hexagon Designs

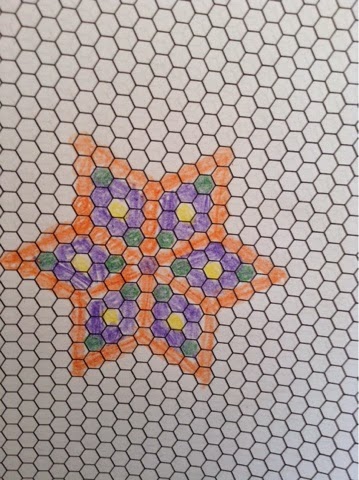
I'm I ended up printing out some hexagon design paper, borrowing a box of colored pencils from my classroom for the weekend, and playing around with some designing. Don't mind the colors- I just just trying to get my eyes to look past the illusion of the hexagons and see different designs. 


While all of these are interesting, and Hubby gave his input by insisting on the second one pictured, I might still just like the traditional Grandmother's Flower Garden the best:


Or


Again, don't mind the colors- I was just playing around. Maybe I should just get to work on fabric making flowers! Until I can get my hands on a hexagon die cut, I'm off to work with my sewing machine!


Friday, April 10, 2015

Handfuls of Scraps- by Edyta Sitar

This. Book. 


So, with all the goodies in the mail the other day, I also received this wonderfully inspirational book. Inside are photographs - much like the cover photo - of antique quilts made from what their creators had on hand at the time, aka scraps. Me? I LOVE scrappy quilts. When I first started quilting a few years ago (has it really been that long?!) I imagined the day when I would have had made enough projects to where I would have lots of scraps. Let me tell you, between being given 'scraps' for the PSQ I've been working on for over a year (again, what?!) that were actually pretty big pieces and buying small amounts of fabric here and there, I've accumulated more scraps than I thought was possible. 

I use the Americana fabric for my Farmer's Wife blocks, everything cotton that I can remember not cutting into yet for my PSQ (trying to cut over 4,000 2" squares and not really have any duplicates, phew!), flannel for baby quilts for friends, water themed and blues are being saved for this year's row by row as the theme is H2O, reds and browns for the 12" house blocks I'm supposedly swapping next month, more scraps for the bookshelf quilt, panels to practice quilting, and others I am sure to be forgetting. 

Of course, what does this book make me want to do? Begin a whole new project, that's what! It's right there in the cover- those beautiful, English paper pieced hexagons. I could totally do those while I'm sitting on the couch in the evenings watching tv rather than being here online.  Speaking of paper piecing and hand stitched projects, I was forgetting some things. I am also working on a scrappy pineapple quilt (paper pieced, but I've never tried English paper piecing) and red work embroidery for a snowman quilt. Did I mention I also crochet and just recently bought my first pair of needles to teach myself to knit? I. Don't. Need. Another. Project. 

And yet, there the book sits, cover staring up at me, wanting me to dig out more of my scraps and cut them into tiny hexagons. I did just learn how to reverse appliqué by hand and did recently hand quilt a twin sized flannel quilt (oh, no! Just remembered I still need to bind that one, ugh, my least favorite part), so I know I enjoy stitching by hand. Plus, it's highly portable- even more so than my redwork embroidery that's in a medium sized hoop. It would be another long term project, and I have PLENTY of those going on. 

Well, if you are like me and love scrappy quilts, you should check out "Handfuls of Scraps- Pieced into Amazing Quilts" by Edyta Sitar. Not only does it start out with a different quilt on each page, but it goes on to give you step by step instructions on your own scrappy quilt- including the one on the cover. I'm off to go work more on my current projects, so maybe-just maybe- I can someday make an English paper pieced Flower Garden of my own. 

Thursday, April 9, 2015

Sew All the Stitches! Run All the Miles!

Perhaps this should be part of my motto in life. I sure have taken a liking to both sewing and running as of late. Plus, being a teacher on Spring Break at home after cleaning the house sure has its perks! 

I am currently working on paper piecing 10" blocks for a bookshelf quilt. It may or may not turn into a present for a friend, so I won't share any pictures. Although I am tempted because they are turning out so well, so maybe some teasers will come into play some time. Until then, here is what I came up with for Summer decorations for my burlap wreath I conquered last month:


Half a yard of shimmery tulle and a real starfish from France I somehow managed to bring back in one piece quite a few years ago for my (then) boyfriend (who is now my hubby!). Simple, yet elegant- just the way I like it.

Wednesday, April 8, 2015

Goodies!

Look what came! My package came a couple days ago, and I ripped open the box. See the previous post to find out where all these goodies came from! I'm off to get back to using them. 😃👏


Tuesday, March 31, 2015

I Won?!

So....I got home from work today and browsed Facebook as my usual daily down-time routine. In my newsfeed, Kim over at Persimon Dreams had posted with a link inviting everyone to read her new blog post, which just so happens to be the revealing of the grand prize winner for PQ6. I clicked on the link and thought please pick me, please be my name as I quickly scrolled down until I saw a picture of one of her daughters with a piece of paper in her hand. My heart fluttered as I realized that it was, in fact, my name!! I couldn't believe it- I even did a little dance and probably hollered out loud! I hadn't even made it inside at this point, so I must have been a sight to my neighbors.. I then promptly went through and read the entire post. She linked to me, so if you are from her blog, welcome! If not, please click on the above link to go straight to the post so you can see all of the wonderful sponsors and the master mind from this year's PQ6. If you have never participated, I definitely recommend it for next year. Whether you win or not, it is really all about the community and the wonderful challenge of completing a quilt every week. I love the feeling of accomplishment I have felt these past two years I have participated in Project Quilting! Thank you, Kim, and thank you to all the sponsors for the amazing prizes I have won! Thank you, thank you!

Sunday, March 22, 2015

Pig in a Polk

Edit: this animal themed quilt has been entered into Lily Pad's Animals on Quilts Contest in August, 2015. Thank you for visiting!


I enjoy making simple all flannel baby blankets since they're so cozy to wrap up in. This one is super bright. I wasn't sure I liked it at first, but now I have a strange fondness for it. I call it "Pig in a Polk" - a twist on the food since there are piggies on the backing fabric and the front has Polk a Dots!


I brought the farm fabric from behind to make the binding. It's pretty small - 36" by 27" - but is flexible to tuck around a baby. Can be used as a receiving blanket to swaddle! Horrah for another one getting done!

Saturday, March 21, 2015

Disappearing Four Patch Hot Pad

Sooooo I originally made this thinking I could use it for PQ6. But then I read all he requirements again. Whoops. Guess I'll be making something with more charms!

My name got pulled for a prize last week! Yay!! Looking forward to receiving it in the mail. Until then, tomorrow is the deadline for the last challenge of the year, and it's a bit sad. Fortunately, I've been able to participate in all six challenges this year! This week's theme was to use 5" charms. This week was super busy for me, so I decided to go with something small. I took four charms and created a disappearing four patch hot pad. The quilting part was fun since it slid easily on the machine. 


Thank you , Kim, for PQ!

Saturday, March 7, 2015

Pillow Cases for Homeless Children

The quilt guild I'm a part of was helping a Girl Scout meet her goal of 50 pillow cases for children in homeless shelters. Why pillow cases? She explained that the children can't take much of their personal belongings, but they are given their own pillow cases with hygiene necessities. Therefore, it's a special personal property that needs to be more comforting for those children. Took my machine thinking I'd be sewing them with other women. Instead I got to teach two scout girls: a Jr. and a Brownie how to make them. We completed two with each taking turns at the wheel, but with me steering both in the right direction. It meets the criteria of three or more layers. Here's the second one I call "Froggie's my Friend" on top a pile from the others who were there, too!


Isn't the fabric adorable? I really like the froggies and can think of a ton of other projects to sew them into. Three fabric lines donated boxes of fabric for this project, and it was fun to play with the different fabrics. I let the girls choose the coordinating fabrics as these would ultimately go to children their own ages. It's sad to think that children that age could be homeless, but it happens. Makes me thankful for organizations like the Girl Scouts who teach girls skills that will be applicable later in life and also challenge them to complete projects that help others less fortunate, such as this project this particular Girl Scout decided to do. She had to decide on a project, write a speech, address about a hundred of us during a quilt guild meeting, and organize companies and quilters who have the materials plus younger scouts to assist. I couldn't take any more pictures, due to privacy, but there were about fifteen adults helping over thirty girls with ages ranging from I'm guessing six to twelve plus their parents. The two girls working with me were sisters, and their mom took plenty of photos of us in action. You will just have to imagine it. Just know that many children in homeless shelters will at least have fun and cuddly pillow cases to call their own!


Sunday, March 1, 2015

Favorite Fabric- PQ Challenge #5

This week's PQ Challenge is to use our favorite fabric. Well, if you are at all involved with fabric then you know that this is a really hard thing to decide especially if you only buy fabric if you just can't leave the store without it. I love Moda's Winter Wonderland fabric, but I have that reserved for a red work project and I just about already finished a flannel quilt in which I used a birdie fabric I absolutely loved, so of course that's out. There are also those fabrics that you may have favored for reasons besides being pretty or lovely. I have this fabric that is my favorite in the way of being whimsical and I bought it just for that reason without having any idea what I could use it for. I may possibly figure that out this week as I think I will try to come up with a design using it in this week's challenge. 


Like I said- whimsical, huh? Any ideas?


Saturday, February 21, 2015

50 Shades of Pink

This week's challenge had everything to do with hearts! I had bought a few quarter yards of Valentine fabric last year, so I finally got the inspiration to use it. 

Last Monday I got the chance to check out a quilt guild that meets about four miles from my house. I had been meaning to attend for months now, but every month the second Monday would come and go and I would remember the meeting after the fact. This time I kept reminding myself and had my husband remind me all day, too. Unfortunately, I woke up with a sore throat that day, but I took some cold medicine and took a nap when I got home from work and was still able to make the meeting that evening! All this to say..one of the members was making a presentation all about the Kuna people of Panama making Molas, and this is what gave me the inspiration on how to start this week's challenge. After the demonstration of how to reverse appliqué (maybe I'll explain more about what I learned about Molas another time, if you're interested- it's quite intricate!), I took a small kit home and practiced on the pig outline that came in it. It was my first time doing hand appliqué, let alone reverse hand appliqué, and strangely enough I enjoyed it! Soooo when the hearts theme was announced, I knew I wanted to use this technique to create some hearts. 
I machine basted by following the heart outline I had drawn on the back using a paper template I had drawn and cut out. This way, when I pulled out the white machine thread, the material would fold nicely under where the needle holes were made and I could hand sew it easily with the black thread. This was fun to do while I watched television shows during a couple of the snow days we had (teachers get snow days, too!). It also gave me a chance to think about what design to use to create the rest of the quilt. Since each fabric was 1/4 yard, I decided on simple 9" squares. I added the hearts, but I wanted more than just rearranging the squares and sewing them together with a diagonal pattern.  I had some black flannel fabric with white hearts, so I tried out the sashing technique. 
I had lots of flannel left over, so I added a border and included it with the purple and white hearts flannel fabric on the back. Binding is my LEAST favorite part of quilting, so I skipped it all together- I sandwiched it together right sides together..
..cut out the batting exactly and placed it on top, sewed it almost all the way around like a pillow, and pulled it right sides out. Here is the messy process of getting all the fabric through the small hole I left after triple sewing each side. 
It was so worth it, though. I chose a decorative stitch on my machine and stitched all the way around the edges. 
Quilting got to come last instead of the tedious binding! I did a simple zig zag, and probably should never throw it in the washing machine since I didn't quilt it very much. I will show you the back first, and with close looking you can see the three zig zags.

With all the sparkly Valentine fabric I found last year and got to use in this quilt, I think it turned out so pretty. These kind of sparkles are the best kind- you can touch it to anything and glitter does not get everywhere! Plus, all that pink goes well wih breast cancer awareness. Win win. I'm sure you were wondering about the name of my quilt- well, with all this movie talk going around, I felt led to twist it into the color pink, instead, because there is actually a website that goes by that name who take donations for cancer research. I feel it's better to promote this kind of love rather than the "gray" kind. 
The finished quilt is 67" by 50" and ended up being kind of heavy. 

It's perfect for those cold February snow days for snuggling up under on the couch and watching my favorite shows! If you enjoy it, please vote for "50 Shades of Pink" at http://www.persimondreams.blogspot.com/2015/02/have-heart-challenge-4-of-project.html and check out the other quilts others were inspired to create!


Sunday, February 8, 2015

UFO PQ3 Challenge- Tied Strings

Edit: this quilt has been entered into Lily Pad's Pets on Quilts Show Contest in August, 2015. Thanks for visiting! Isn't Tate the cutest Morkie ever?

This week's Project Quilting Challenge was to finish a UFO (Unfinished Finished Object)! Being a person who likes to try many different patterns and techniques, I had quite a few UFOs. Hehe  One of them consisted of a few of these squares-I had made them by cutting squares from the yellow pages of a phone book and sewing scrap strips diagonally to them. I was leaving them in a drawer until I had more scraps to make a bigger quilt, but I its this challenge I had to go for it. Here are the squares right out of the drawer:
So, away I went sewing them all together. What took the longest in this entire process was ripping that darn paper off after I had the top sewn together! I didn't sandwich the quilt until late last night, then barely sewed the binding on with enough time to link up. I submitted my finished "String Quilt" with four minutes to spare. Phew! I didn't even have enough time to take a decent picture! Here's the picture I got in time to link up:
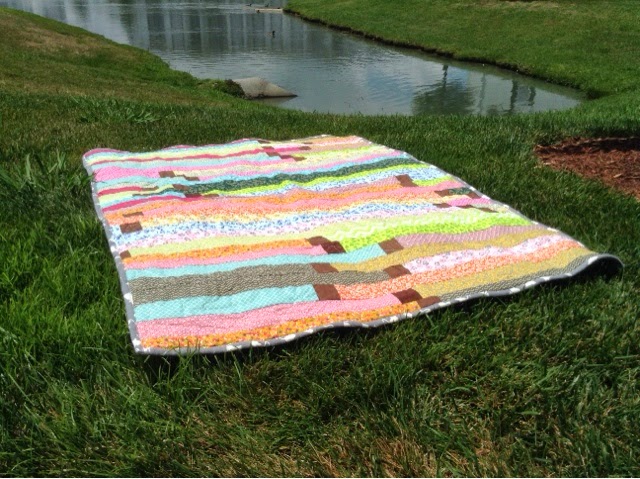
Thankfully, it's in the 60s and a beautiful day outside, so I took my Morkie outside (even if he's scruffy and needs a bath), and got a couple of pictures to edit this post:
The back is also scrappy- isn't it fun? It's 40" by 40" and I tied it rather than FMQ because I felt like it would take away from the design. 
I hope you like scrappy quilts as much as I do!


Saturday, January 24, 2015

Sunset(rise) Challenge for PQ6

In January of last year I discovered a blog (persimondreams.blogspot.com) that hosted a challenge called "Project Quilting." It's based on the tv show, "Project Runway," except instead of only a few hours to create wardrobes, you have a week to finish a quilt based upon that week's theme. Beginning on Sunday at 1:00pm EST, she announces the theme for that week. The project you create can be any size, and it doesn't really even have to be a quilt as long as you follow at least one of the three rules she sets out and it's finished and linked to her blog by the same time a week later. The popular vote then begins. Everyone has until the following Friday to vote for their six favorites. The creation with the most votes wins the popular vote, and everyone's name is thrown in a hat to be drawn for other prizes. The next challenge begins again that Sunday-two weeks after the first one was announced. This continues for six challenges. 

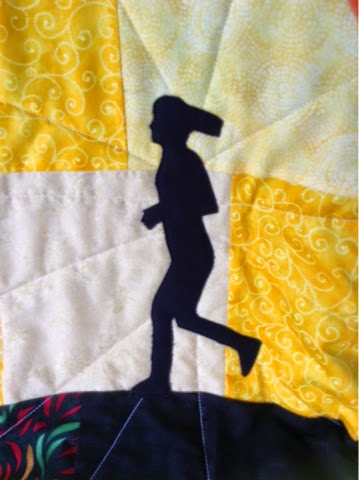
Inspiration, challenges, prizes and competition with others while getting to "work together" with them? Of course I participated! Now I'm in my second season of participation, and we are in the second challenge of the year. The theme was Sunrise/Sunset. The first thought that came to my mind was the silhouette painting I had done with a friend of an African scene featuring an elephant and a tree. The background was a gigantic yellow sun setting amongst a red sky. I started with that by rummaging in my scrap pile for yellows, oranges, pinks and reds and began piecing them together. What emerged was a round yellow piece for the sun and the negative area in orange. Last summer I learned how to sew in a curve, so I attached the two together using that technique. I did the same after piecing blacks together, although this was with a much less extreme curve. In the mist of all this piecing, I took a break to take a run in the dusk of the day and saw my shadow. This made me decide to draw a picture of myself and use the outline to create a sort of self portrait on my quilt. Needless to say, I am quite proud of the result!
I had to take this picture in the gloomy outside light since it poured all day, but don't you just love it? That's my outline and it all pieced together so nicely. It ended up being 32" by 27" and I think it may turn into my first wall hanging. Here are some close ups:
..and the back of the quilt where the appliqué outine is..
..all pieces from what the colors of the sunset or sunrise would consist of. For now, I'm calling her "A New Dawn." Here she is laid down flat with Tate showing you the size.
What is your interpretation of a sunrise/sunset?

**Edit** My quilt is #53 of the link ups at http://www.persimondreams.blogspot.ca/2015/01/sunrisesunset-challenge-2project.html so please take a minute to go vote for "A New Dawn!" Thank you!


Tuesday, June 24, 2014

Muddy Spring Flowers

I finished a quilt today. I started it a couple months back after seeing a Fons and Porter television episode on a certain strip technique that I immediately decided I just had to try out. I had some delicious fabric in my stash that I believed would look just darling together in a quilt, so I gathered it up and began cutting strips. I had been waiting for the opportune project to come along so I could use all those lovely designs, and this seemed to be the one. 

After cutting enough 2.5" by WOF strips to total around 40 in order to end up with a good lap sized quilt, I pulled out some 2.5" squares that I had already cut for a previous quilt and were extra. I counted them up and had enough of the browns to use for the quilt, so that's what I went with. (In hindsight they don't really match the quilt, but they are also the inspiration for the name. When it's spring and there's rain, there of course has to be some mud along with it. This quilt kind of portrays the way spring can be as one walks down a lane: pretty flowers blooming, a patch of mud, another row of flowers, another patch of mud, and so forth. You have to think a little creatively to see it. As for the kitties on the back, well, that's just for the person cuddling underneath the quilt to enjoy as the backing is flannel and whomever gets it I'm sure loves kitties.)

I then sat down at my machine and began sewing away. I grabbed a random strip and sewed the 2.5" end to a square, grabbed another random strip and sewed it to the other end of the square. I continued with this pattern, strip square strip square, until I had one loooooong strip of strips and squares and had used all my cut pieces. This is where the fun part come in. I took each end of my long strip, put them right sides together, and began sewing them together on one long side. I continued sewing (it took a bit!) until I made it where the middle of the strip would be. It was twisted here, but that's okay because I just snipped it and finished up the sewing to the end. I then had a long double strip half the size as it was before. I again put the two ends together and sewed the long sides together. I did this until the quilt was the correct size. It is a neat technique and comes together fairly quickly, depending on how fast one sews. I have already taught two of my friends who have never made a quilt before how to do this and I am proud to say that one has already completed her quilt top and is moving on to sandwiching it together. She did not use squares and carefully chose matching fabrics for her strips, so it is very lovely. I cannot wait to see it finished!

Here is mine all finished, after ripping out part of the quilting that "eyelashed" and redoing it, it actually didn't turn out too bad. 


Thursday, January 23, 2014

West Virginia Wild Flowers Blankie

*I don't know why this post has decided not to work. When I figure out how to fix it, please check back to see all the lovely pictures! Thanks!*

You know how a couple blog posts ago I showed you some granny squares I had been working on?  I kind of left you hanging, so I'm sure you would like to see what became of them.  I decided to crochet up some circles in different colors after being inspired by wildflowers as we drove through the state of West Virginia on a trip.
Displaying photo 2.JPG
Circles!


Displaying photo 1.JPGThese are made with the same type of yarn that I had used for the granny squares.  I then randomly laid them out together and adjusted the colors to be spread out to see how many more I would need.
After I had enough to make a baby sized blanket, I started the crochet-as-you-go method.  Let me tell you....I was SO glad this blanket was of a small size!

Displaying photo 3.JPG
Joining it all together.

Do you see how this process could take awhile?  The finished product is just so lovely, though.


Displaying photo 4.JPG
Here is the back with all the ends that need to be sewn in to make sure the entire project does not unravel!  Ta da!


Displaying photo 5.JPG
All complete with a border.

Sunday, January 19, 2014

Training for a Half Marathon

Lately, my passions have turned from crochet to quilting and running. I really need to show you the lovely and fun quilts I have been sewing, but for now you will have to be content with my recap of yesterday's run.  Keep in mind that I'm not a fast runner by any means. I usually only run 5ks, and if any of my friends run the race with me then they usually win medals while I'm close to last in our age group. I have been working on it with more of a gusto this past month, however, (after barely running at all last year), and I'm pretty determined to run a half marathon. The longest race I've participated in was an 8k, and before yesterday the farthest I've ever ran at once was six miles. If you have a goal you want to work toward and want a little inspiration, here's one of my running stories:

My adventure yesterday:


I needed to do a long run, but I didn't want to drive anywhere so I decided to run to our nearest park. (Which, in the process of my run I found it to be a mile and a half away.) I live in the middle of urbania. Literally. So, the run to the park was an adventure in itself. Even if I was on the sidewalk, there's still hundreds of cars flying by you and switching lanes, then there's the matter of crossing roads and intersections.  When I finally got to the park, I ran the nearly two miles around it and the lake.  I thought it had been windy before that, but oh boy was the wind off the lake strong and cold! It was creating small waves and making it hard to run against it.  I found out later that wind gusts were 19mph with wind chill at 27 degrees, and I definitely felt that. I thought about going around again, but I still had to make it home so I headed back. I then had to wait on a light, so I ran up and down the sidewalk waiting for the light to change. Mind you, this street has four lanes to cross and is on the way to the interstate, so I'm sure lots of people were staring from all those cars sitting there and speeding by. I did make it back without getting run over. All of that excitement and that trio wasn't even five miles, so I had to jog a bit around my neighborhood. I didn't make my goal of seven miles for the run, but I did make it to a half of a half marathon (6.55) and over an hour and a half of running. That's my farthest and longest run to date and perhaps the most exciting!

Sunday, July 7, 2013

Colorful Afghans (Sneak Peek)

I'm sorry. I know it's been a while since I've shown you any of my crochet creations. A full time job can have a tendency to take up most of one's crochet and blogging time! Well, here is a sneak peek of what I have been working on:


I know, I know.. What about my amigurumi lovelies? You may ask. I'll admit, I got a little distracted by Pinterest, and it led me to some awesome blogs that made granny squares look really intriguing. I was a little intimidated by the multicolored squares because of all the changing and tying in ends I'd have to do, so for my first experience with granny squares I went with a solid color square. The above picture is of the granny squares I have done so far. It was a super simple pattern that I found at Little Tin Bird's blog found at http://www.littletinbird.co.uk/solid-granny-squares-pattern-elmer-squares/
(I'm doing this post from my iPad and can't figure out how to link it.). If you want to get a start on your own solid color granny square afghan, then check out her blog!

The more I looked at multicolored afghans on Pinterest, the more I wanted to do one. Sooooo..


Here's the next one I started working on! Besides "colorful" what word would you use to describe this? I can't wait until I finish it and I can show you how beautiful it is!

That's all for now. I hope you enjoyed the 'colorfullness'!

Saturday, April 20, 2013

Amigurumi Doll

HERE SHE IS!!!!  My first amigurumi doll!
As you can tell from the picture, she's around ten inches tall.  She doesn't have a complete face yet, but once I decide what emotion is going to look best on her then I'll embroidery one on.  Any suggestions???  I'm open to opinions from fellow creators!  Also, this doll may be made by me, but it's not my pattern.  I have Beth over at By Hook, By Hand to thank for the patterns!  You can find these patterns HERE.  Beth has an extensive amount of patterns for different dolls, settings, doll clothing and more, so I highly encourage you to clink on the link and get inspired to make some dolls of your own!

Since this was my first experience in crocheting a doll, I decided that the basic doll pattern was the best option for me.  It proved to be quite simple!  I enjoy working in the round-I think that's why making amigurumi is much for fun for me than making blankets and scarves.  I believe it is an art form, too!  With art also comes lots of room for improvement, and this dolly shows some of what I need to fix in order for the next one I make to turn out even better.  I'll be showing you more pictures of her this next week and pointing out some areas that I will be changing for my next doll (who is being started today!).  Hope you are inspired!  :)

Wednesday, April 10, 2013

Doll Teaser

I know..I know!  I just started this blog and I already left you hanging for a few days!  I had a lot more free time when I started this, but I am now teaching (YAY!) so you won't see me every day.  I do have a few more lovelies (for those of you who haven't read my other posts, lovelies are what I call the amigurumi or other things that I crochet) to show you, so do please come back to see them in my future posts. 

Until then, here's a little teaser on the doll (my first one!) I have been working on. 
 Here are the finished legs and the unstuffed head.  It looks a little funny so far, but this is only a part of the doll.  It's a good start.


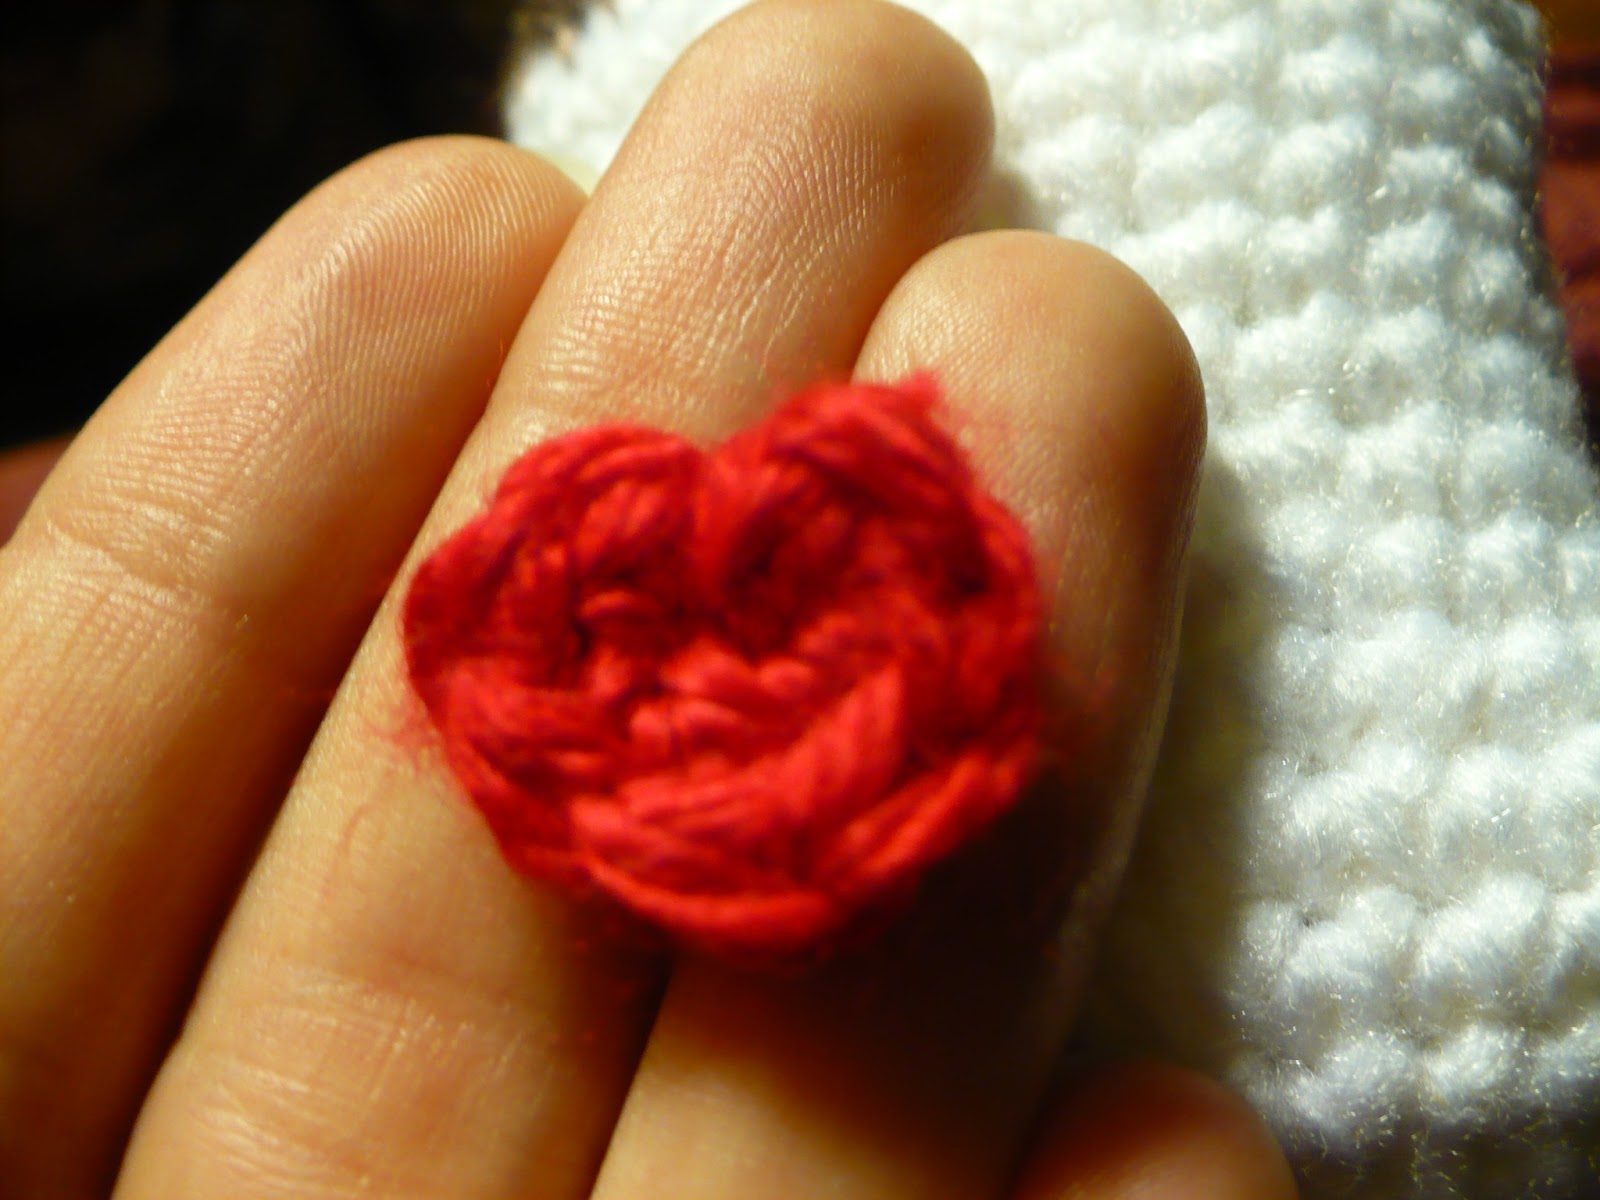
 I like to make hearts for my lovelies.  :)  I think it gives them a little more character and if a little girl was to ever get one I can tell her it has a heart 'just like her.'
See how tiny her heart is?  It's the perfect size for her, though!

Hope you enjoyed these "teasers."  See you later and have a great week!!

Saturday, April 6, 2013

Rarely Used Blenders and Green Smoothies

 Do any of you have a blender that you just HAD to have but is now sitting in your cupboard or garage somewhere not being used?  If you're anything like me, then you do.  I simply had to have a blender on our wedding registry a year and a half ago.  I happened to get it as a wedding present, and I was SO excited.  I love anything kitchen because I love baking, cooking and experimenting in the kitchen.  Well, I used it a couple of times before it found its way back into the cupboard as other things took over my time.

We moved a few months ago due to being a military family, and I was determined to get to use my beloved blender.  I started by experimenting with smoothies.  After I found out how easy it was to make them, the blender has hardly been off the counter since. About a week ago, I was (of course) scrolling through Pinterest when I found a blog where they are all about green smoothies.  Having never even tried a green smoothie, I read on and this is the end result....
  
Over on Jadah and Jen's blog, found HERE, they are promoting green smoothies by challenging readers to drink one every day for the month of April.  I accepted the challenge (although, I am somewhat not living up to it at the moment since I haven't had one yet today), and I have some pictures of my experiments to share with you.

Okay, so you may be thinking GROSS - GREEN smoothies?!  Yes, green smoothies do consist of foods you may not like when they are consumed all by themselves, such as fresh spinach.  The good news, however, is that smoothies are not just one ingredient blended up for you to drink.  They consist of many healthy ingredients that compliment each others' flavors.  Let's take a look at one of the smoothies I created this past week:
 Spinach was the staple in every smoothie I made.  I know what you're probably thinking.  You're probably thinking, "Oh, yuck!  Spinach in a drink?  I could never like that!"  Well, let me tell you something.  I wasn't too fond of the idea either until I tried it.  No, I didn't use the entire drainer full above.  I used about a hand full of leaves and placed them in my blender right above the ice.  I didn't use any of the great recipes found over on the Simple Green Smoothie site, but I used the general idea of their recipes and sort of gauged my own.

Next, I added a few blueberries (frozen), cut up a banana, poured in about 1/3 cup or so of vanilla yogurt and just enough water (or orange juice) so it would help it blend, put on the lid and turned it on the lowest setting.  Check out how nicely it was mixing together:
 If you find that your smoothie is grinding but nothing seems to be blending together, then put in a little more liquid.  This will help the solid ingredients get pulled downward so they will get chopped up.  I like to blend mine until the vortex has appeared in the middle and the top starts bubbling.  (This way, it will get chopped up nicely and I won't have too much stuff to chew.)

Ta-Da!  All blended together and green!
 Most of the time I somehow gauge it just right where it all fits perfectly in a tall glass.  This time, I poured it in a glass that has a couple green dots and even used a green straw so you could see just how green this smoothie is.  I didn't even try the drip that dove off the side of the blender as I was pouring it.  I waited until it was all perfectly in the glass to try the very first taste.  I was pleasantly surprised.  The banana (and whatever other fruit you happen to add) out does the flavor of the veggies you put in the smoothie, so I could mostly only taste the banana!  Fruit also has natural sugar, so you don't have to add any extra sugar or sugar substitute to make it taste sweet.  Fruit smoothies taste sweet all on their own.

Sooo..if you happen to have a blender that's been sitting around unused for a while, bring it out, dust it off and try your hand at your own green smoothie!  I would LOVE to hear about how yours turns out!