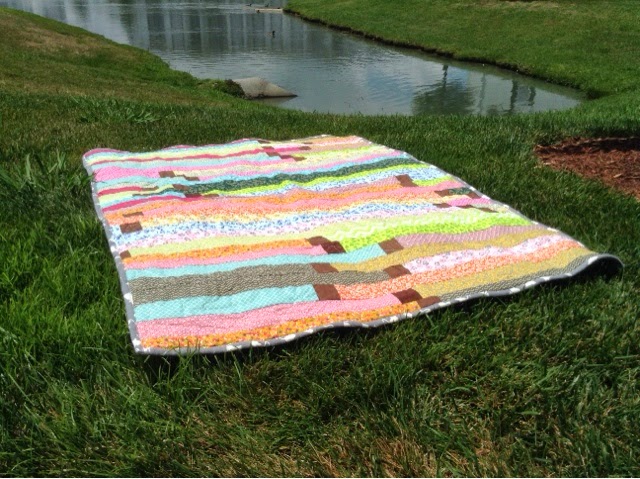
I finished a quilt today. I started it a couple months back after seeing a Fons and Porter television episode on a certain strip technique that I immediately decided I just had to try out. I had some delicious fabric in my stash that I believed would look just darling together in a quilt, so I gathered it up and began cutting strips. I had been waiting for the opportune project to come along so I could use all those lovely designs, and this seemed to be the one.
After cutting enough 2.5" by WOF strips to total around 40 in order to end up with a good lap sized quilt, I pulled out some 2.5" squares that I had already cut for a previous quilt and were extra. I counted them up and had enough of the browns to use for the quilt, so that's what I went with. (In hindsight they don't really match the quilt, but they are also the inspiration for the name. When it's spring and there's rain, there of course has to be some mud along with it. This quilt kind of portrays the way spring can be as one walks down a lane: pretty flowers blooming, a patch of mud, another row of flowers, another patch of mud, and so forth. You have to think a little creatively to see it. As for the kitties on the back, well, that's just for the person cuddling underneath the quilt to enjoy as the backing is flannel and whomever gets it I'm sure loves kitties.)
I then sat down at my machine and began sewing away. I grabbed a random strip and sewed the 2.5" end to a square, grabbed another random strip and sewed it to the other end of the square. I continued with this pattern, strip square strip square, until I had one loooooong strip of strips and squares and had used all my cut pieces. This is where the fun part come in. I took each end of my long strip, put them right sides together, and began sewing them together on one long side. I continued sewing (it took a bit!) until I made it where the middle of the strip would be. It was twisted here, but that's okay because I just snipped it and finished up the sewing to the end. I then had a long double strip half the size as it was before. I again put the two ends together and sewed the long sides together. I did this until the quilt was the correct size. It is a neat technique and comes together fairly quickly, depending on how fast one sews. I have already taught two of my friends who have never made a quilt before how to do this and I am proud to say that one has already completed her quilt top and is moving on to sandwiching it together. She did not use squares and carefully chose matching fabrics for her strips, so it is very lovely. I cannot wait to see it finished!
Here is mine all finished, after ripping out part of the quilting that "eyelashed" and redoing it, it actually didn't turn out too bad.
Tuesday, June 24, 2014
Thursday, January 23, 2014
West Virginia Wild Flowers Blankie
*I don't know why this post has decided not to work. When I figure out how to fix it, please check back to see all the lovely pictures! Thanks!*
| Circles! |
After
I had enough to make a baby sized blanket, I started the
crochet-as-you-go method. Let me tell you....I was SO glad this blanket
was of a small size!
| Joining it all together.
Do you see how this process could take awhile? The finished product is just so lovely, though.
Here is the back with all the ends that need to be sewn in to make sure the entire project does not unravel! Ta da!
|
Sunday, January 19, 2014
Training for a Half Marathon
Lately, my passions have turned from crochet to quilting and running. I really need to show you the lovely and fun quilts I have been sewing, but for now you will have to be content with my recap of yesterday's run. Keep in mind that I'm not a fast runner by any means. I usually only run 5ks, and if any of my friends run the race with me then they usually win medals while I'm close to last in our age group. I have been working on it with more of a gusto this past month, however, (after barely running at all last year), and I'm pretty determined to run a half marathon. The longest race I've participated in was an 8k, and before yesterday the farthest I've ever ran at once was six miles. If you have a goal you want to work toward and want a little inspiration, here's one of my running stories:
My adventure yesterday:
I needed to do a long run, but I didn't want to drive anywhere so I decided to run to our nearest park. (Which, in the process of my run I found it to be a mile and a half away.) I live in the middle of urbania. Literally. So, the run to the park was an adventure in itself. Even if I was on the sidewalk, there's still hundreds of cars flying by you and switching lanes, then there's the matter of crossing roads and intersections. When I finally got to the park, I ran the nearly two miles around it and the lake. I thought it had been windy before that, but oh boy was the wind off the lake strong and cold! It was creating small waves and making it hard to run against it. I found out later that wind gusts were 19mph with wind chill at 27 degrees, and I definitely felt that. I thought about going around again, but I still had to make it home so I headed back. I then had to wait on a light, so I ran up and down the sidewalk waiting for the light to change. Mind you, this street has four lanes to cross and is on the way to the interstate, so I'm sure lots of people were staring from all those cars sitting there and speeding by. I did make it back without getting run over. All of that excitement and that trio wasn't even five miles, so I had to jog a bit around my neighborhood. I didn't make my goal of seven miles for the run, but I did make it to a half of a half marathon (6.55) and over an hour and a half of running. That's my farthest and longest run to date and perhaps the most exciting!
Sunday, July 7, 2013
Colorful Afghans (Sneak Peek)
I'm sorry. I know it's been a while since I've shown you any of my crochet creations. A full time job can have a tendency to take up most of one's crochet and blogging time! Well, here is a sneak peek of what I have been working on:
I know, I know.. What about my amigurumi lovelies? You may ask. I'll admit, I got a little distracted by Pinterest, and it led me to some awesome blogs that made granny squares look really intriguing. I was a little intimidated by the multicolored squares because of all the changing and tying in ends I'd have to do, so for my first experience with granny squares I went with a solid color square. The above picture is of the granny squares I have done so far. It was a super simple pattern that I found at Little Tin Bird's blog found at http://www.littletinbird.co.uk/solid-granny-squares-pattern-elmer-squares/
(I'm doing this post from my iPad and can't figure out how to link it.). If you want to get a start on your own solid color granny square afghan, then check out her blog!The more I looked at multicolored afghans on Pinterest, the more I wanted to do one. Sooooo..
Saturday, April 20, 2013
Amigurumi Doll
HERE SHE IS!!!! My first amigurumi doll!
As you can tell from the picture, she's around ten inches tall. She doesn't have a complete face yet, but once I decide what emotion is going to look best on her then I'll embroidery one on. Any suggestions??? I'm open to opinions from fellow creators! Also, this doll may be made by me, but it's not my pattern. I have Beth over at By Hook, By Hand to thank for the patterns! You can find these patterns HERE. Beth has an extensive amount of patterns for different dolls, settings, doll clothing and more, so I highly encourage you to clink on the link and get inspired to make some dolls of your own!
Since this was my first experience in crocheting a doll, I decided that the basic doll pattern was the best option for me. It proved to be quite simple! I enjoy working in the round-I think that's why making amigurumi is much for fun for me than making blankets and scarves. I believe it is an art form, too! With art also comes lots of room for improvement, and this dolly shows some of what I need to fix in order for the next one I make to turn out even better. I'll be showing you more pictures of her this next week and pointing out some areas that I will be changing for my next doll (who is being started today!). Hope you are inspired! :)
As you can tell from the picture, she's around ten inches tall. She doesn't have a complete face yet, but once I decide what emotion is going to look best on her then I'll embroidery one on. Any suggestions??? I'm open to opinions from fellow creators! Also, this doll may be made by me, but it's not my pattern. I have Beth over at By Hook, By Hand to thank for the patterns! You can find these patterns HERE. Beth has an extensive amount of patterns for different dolls, settings, doll clothing and more, so I highly encourage you to clink on the link and get inspired to make some dolls of your own!
Since this was my first experience in crocheting a doll, I decided that the basic doll pattern was the best option for me. It proved to be quite simple! I enjoy working in the round-I think that's why making amigurumi is much for fun for me than making blankets and scarves. I believe it is an art form, too! With art also comes lots of room for improvement, and this dolly shows some of what I need to fix in order for the next one I make to turn out even better. I'll be showing you more pictures of her this next week and pointing out some areas that I will be changing for my next doll (who is being started today!). Hope you are inspired! :)
Wednesday, April 10, 2013
Doll Teaser
I know..I know! I just started this blog and I already left you hanging for a few days! I had a lot more free time when I started this, but I am now teaching (YAY!) so you won't see me every day. I do have a few more lovelies (for those of you who haven't read my other posts, lovelies are what I call the amigurumi or other things that I crochet) to show you, so do please come back to see them in my future posts.
Until then, here's a little teaser on the doll (my first one!) I have been working on.
Here are the finished legs and the unstuffed head. It looks a little funny so far, but this is only a part of the doll. It's a good start.

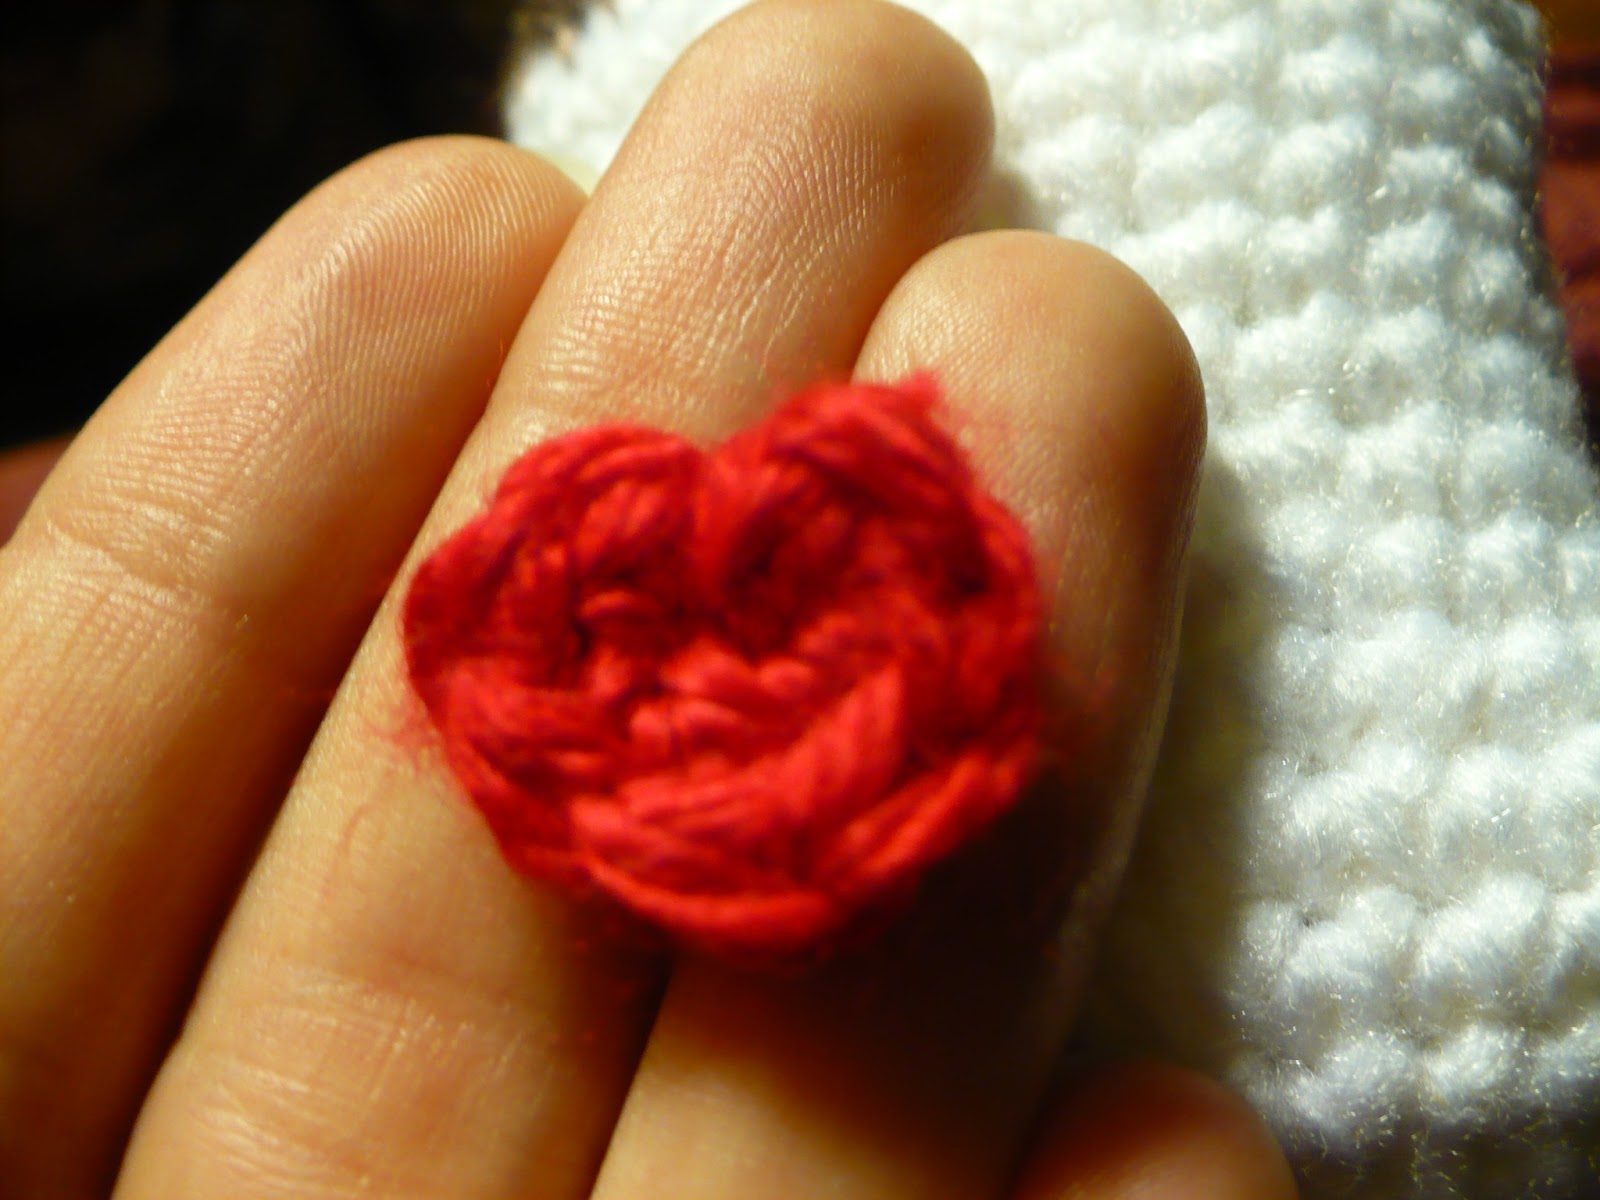
I like to make hearts for my lovelies. :) I think it gives them a little more character and if a little girl was to ever get one I can tell her it has a heart 'just like her.'
See how tiny her heart is? It's the perfect size for her, though!
Hope you enjoyed these "teasers." See you later and have a great week!!
Until then, here's a little teaser on the doll (my first one!) I have been working on.
Here are the finished legs and the unstuffed head. It looks a little funny so far, but this is only a part of the doll. It's a good start.
I like to make hearts for my lovelies. :) I think it gives them a little more character and if a little girl was to ever get one I can tell her it has a heart 'just like her.'
See how tiny her heart is? It's the perfect size for her, though!
Hope you enjoyed these "teasers." See you later and have a great week!!
Saturday, April 6, 2013
Rarely Used Blenders and Green Smoothies
Do any of you have a blender that you just HAD to have but is now sitting in your cupboard or garage somewhere not being used? If you're anything like me, then you do. I simply had to have a blender on our wedding registry a year and a half ago. I happened to get it as a wedding present, and I was SO excited. I love anything kitchen because I love baking, cooking and experimenting in the kitchen. Well, I used it a couple of times before it found its way back into the cupboard as other things took over my time.
We moved a few months ago due to being a military family, and I was determined to get to use my beloved blender. I started by experimenting with smoothies. After I found out how easy it was to make them, the blender has hardly been off the counter since. About a week ago, I was (of course) scrolling through Pinterest when I found a blog where they are all about green smoothies. Having never even tried a green smoothie, I read on and this is the end result....
Over on Jadah and Jen's blog, found HERE, they are promoting green smoothies by challenging readers to drink one every day for the month of April. I accepted the challenge (although, I am somewhat not living up to it at the moment since I haven't had one yet today), and I have some pictures of my experiments to share with you.
Spinach was the staple in every smoothie I made. I know what you're probably thinking. You're probably thinking, "Oh, yuck! Spinach in a drink? I could never like that!" Well, let me tell you something. I wasn't too fond of the idea either until I tried it. No, I didn't use the entire drainer full above. I used about a hand full of leaves and placed them in my blender right above the ice. I didn't use any of the great recipes found over on the Simple Green Smoothie site, but I used the general idea of their recipes and sort of gauged my own.
Next, I added a few blueberries (frozen), cut up a banana, poured in about 1/3 cup or so of vanilla yogurt and just enough water (or orange juice) so it would help it blend, put on the lid and turned it on the lowest setting. Check out how nicely it was mixing together:
If you find that your smoothie is grinding but nothing seems to be blending together, then put in a little more liquid. This will help the solid ingredients get pulled downward so they will get chopped up. I like to blend mine until the vortex has appeared in the middle and the top starts bubbling. (This way, it will get chopped up nicely and I won't have too much stuff to chew.)
Ta-Da! All blended together and green!
Most of the time I somehow gauge it just right where it all fits perfectly in a tall glass. This time, I poured it in a glass that has a couple green dots and even used a green straw so you could see just how green this smoothie is. I didn't even try the drip that dove off the side of the blender as I was pouring it. I waited until it was all perfectly in the glass to try the very first taste. I was pleasantly surprised. The banana (and whatever other fruit you happen to add) out does the flavor of the veggies you put in the smoothie, so I could mostly only taste the banana! Fruit also has natural sugar, so you don't have to add any extra sugar or sugar substitute to make it taste sweet. Fruit smoothies taste sweet all on their own.
Sooo..if you happen to have a blender that's been sitting around unused for a while, bring it out, dust it off and try your hand at your own green smoothie! I would LOVE to hear about how yours turns out!
We moved a few months ago due to being a military family, and I was determined to get to use my beloved blender. I started by experimenting with smoothies. After I found out how easy it was to make them, the blender has hardly been off the counter since. About a week ago, I was (of course) scrolling through Pinterest when I found a blog where they are all about green smoothies. Having never even tried a green smoothie, I read on and this is the end result....
Over on Jadah and Jen's blog, found HERE, they are promoting green smoothies by challenging readers to drink one every day for the month of April. I accepted the challenge (although, I am somewhat not living up to it at the moment since I haven't had one yet today), and I have some pictures of my experiments to share with you.
Okay, so you may be thinking GROSS - GREEN smoothies?! Yes, green smoothies do consist of foods you may not like when they are consumed all by themselves, such as fresh spinach. The good news, however, is that smoothies are not just one ingredient blended up for you to drink. They consist of many healthy ingredients that compliment each others' flavors. Let's take a look at one of the smoothies I created this past week:
Next, I added a few blueberries (frozen), cut up a banana, poured in about 1/3 cup or so of vanilla yogurt and just enough water (or orange juice) so it would help it blend, put on the lid and turned it on the lowest setting. Check out how nicely it was mixing together:
Ta-Da! All blended together and green!
Most of the time I somehow gauge it just right where it all fits perfectly in a tall glass. This time, I poured it in a glass that has a couple green dots and even used a green straw so you could see just how green this smoothie is. I didn't even try the drip that dove off the side of the blender as I was pouring it. I waited until it was all perfectly in the glass to try the very first taste. I was pleasantly surprised. The banana (and whatever other fruit you happen to add) out does the flavor of the veggies you put in the smoothie, so I could mostly only taste the banana! Fruit also has natural sugar, so you don't have to add any extra sugar or sugar substitute to make it taste sweet. Fruit smoothies taste sweet all on their own.
Sooo..if you happen to have a blender that's been sitting around unused for a while, bring it out, dust it off and try your hand at your own green smoothie! I would LOVE to hear about how yours turns out!
Subscribe to:
Posts (Atom)