Sunday, July 7, 2013

Colorful Afghans (Sneak Peek)

I'm sorry. I know it's been a while since I've shown you any of my crochet creations. A full time job can have a tendency to take up most of one's crochet and blogging time! Well, here is a sneak peek of what I have been working on:


I know, I know.. What about my amigurumi lovelies? You may ask. I'll admit, I got a little distracted by Pinterest, and it led me to some awesome blogs that made granny squares look really intriguing. I was a little intimidated by the multicolored squares because of all the changing and tying in ends I'd have to do, so for my first experience with granny squares I went with a solid color square. The above picture is of the granny squares I have done so far. It was a super simple pattern that I found at Little Tin Bird's blog found at http://www.littletinbird.co.uk/solid-granny-squares-pattern-elmer-squares/
(I'm doing this post from my iPad and can't figure out how to link it.). If you want to get a start on your own solid color granny square afghan, then check out her blog!

The more I looked at multicolored afghans on Pinterest, the more I wanted to do one. Sooooo..


Here's the next one I started working on! Besides "colorful" what word would you use to describe this? I can't wait until I finish it and I can show you how beautiful it is!

That's all for now. I hope you enjoyed the 'colorfullness'!

Saturday, April 20, 2013

Amigurumi Doll

HERE SHE IS!!!!  My first amigurumi doll!
As you can tell from the picture, she's around ten inches tall.  She doesn't have a complete face yet, but once I decide what emotion is going to look best on her then I'll embroidery one on.  Any suggestions???  I'm open to opinions from fellow creators!  Also, this doll may be made by me, but it's not my pattern.  I have Beth over at By Hook, By Hand to thank for the patterns!  You can find these patterns HERE.  Beth has an extensive amount of patterns for different dolls, settings, doll clothing and more, so I highly encourage you to clink on the link and get inspired to make some dolls of your own!

Since this was my first experience in crocheting a doll, I decided that the basic doll pattern was the best option for me.  It proved to be quite simple!  I enjoy working in the round-I think that's why making amigurumi is much for fun for me than making blankets and scarves.  I believe it is an art form, too!  With art also comes lots of room for improvement, and this dolly shows some of what I need to fix in order for the next one I make to turn out even better.  I'll be showing you more pictures of her this next week and pointing out some areas that I will be changing for my next doll (who is being started today!).  Hope you are inspired!  :)

Wednesday, April 10, 2013

Doll Teaser

I know..I know!  I just started this blog and I already left you hanging for a few days!  I had a lot more free time when I started this, but I am now teaching (YAY!) so you won't see me every day.  I do have a few more lovelies (for those of you who haven't read my other posts, lovelies are what I call the amigurumi or other things that I crochet) to show you, so do please come back to see them in my future posts. 

Until then, here's a little teaser on the doll (my first one!) I have been working on. 
 Here are the finished legs and the unstuffed head.  It looks a little funny so far, but this is only a part of the doll.  It's a good start.


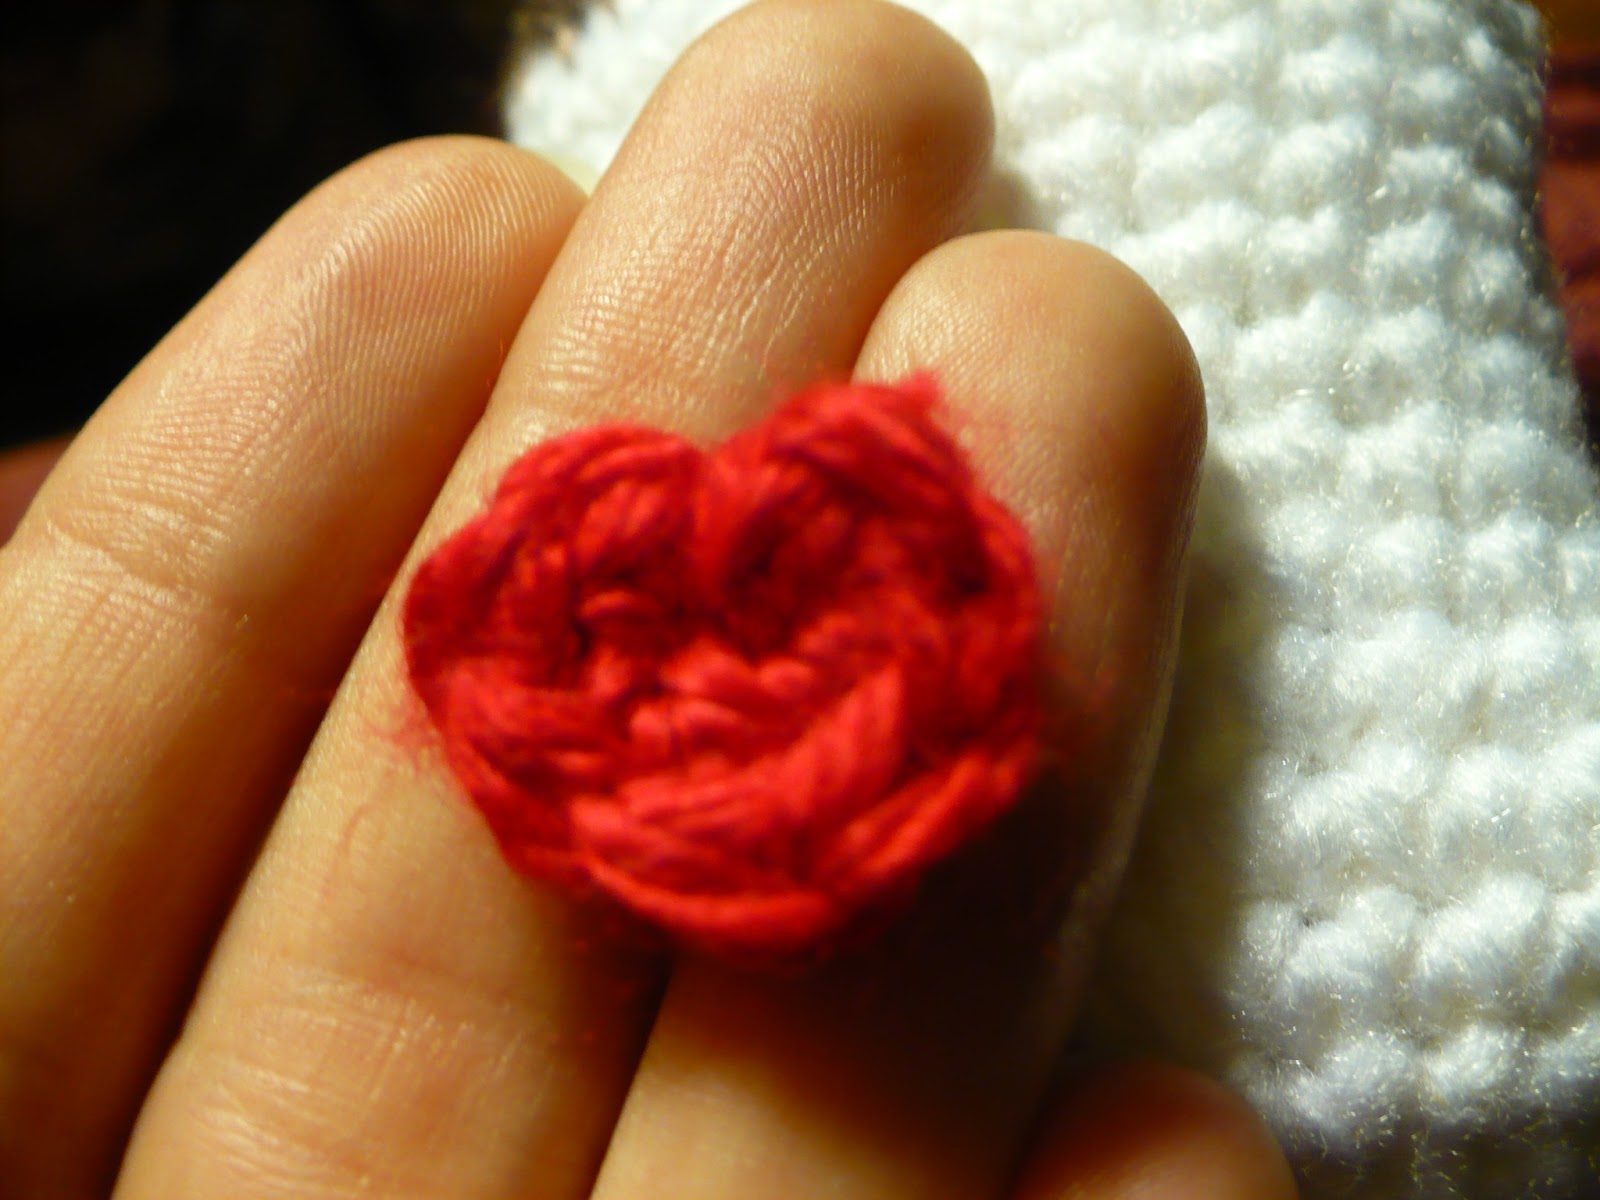
 I like to make hearts for my lovelies.  :)  I think it gives them a little more character and if a little girl was to ever get one I can tell her it has a heart 'just like her.'
See how tiny her heart is?  It's the perfect size for her, though!

Hope you enjoyed these "teasers."  See you later and have a great week!!

Saturday, April 6, 2013

Rarely Used Blenders and Green Smoothies

 Do any of you have a blender that you just HAD to have but is now sitting in your cupboard or garage somewhere not being used?  If you're anything like me, then you do.  I simply had to have a blender on our wedding registry a year and a half ago.  I happened to get it as a wedding present, and I was SO excited.  I love anything kitchen because I love baking, cooking and experimenting in the kitchen.  Well, I used it a couple of times before it found its way back into the cupboard as other things took over my time.

We moved a few months ago due to being a military family, and I was determined to get to use my beloved blender.  I started by experimenting with smoothies.  After I found out how easy it was to make them, the blender has hardly been off the counter since. About a week ago, I was (of course) scrolling through Pinterest when I found a blog where they are all about green smoothies.  Having never even tried a green smoothie, I read on and this is the end result....
  
Over on Jadah and Jen's blog, found HERE, they are promoting green smoothies by challenging readers to drink one every day for the month of April.  I accepted the challenge (although, I am somewhat not living up to it at the moment since I haven't had one yet today), and I have some pictures of my experiments to share with you.

Okay, so you may be thinking GROSS - GREEN smoothies?!  Yes, green smoothies do consist of foods you may not like when they are consumed all by themselves, such as fresh spinach.  The good news, however, is that smoothies are not just one ingredient blended up for you to drink.  They consist of many healthy ingredients that compliment each others' flavors.  Let's take a look at one of the smoothies I created this past week:
 Spinach was the staple in every smoothie I made.  I know what you're probably thinking.  You're probably thinking, "Oh, yuck!  Spinach in a drink?  I could never like that!"  Well, let me tell you something.  I wasn't too fond of the idea either until I tried it.  No, I didn't use the entire drainer full above.  I used about a hand full of leaves and placed them in my blender right above the ice.  I didn't use any of the great recipes found over on the Simple Green Smoothie site, but I used the general idea of their recipes and sort of gauged my own.

Next, I added a few blueberries (frozen), cut up a banana, poured in about 1/3 cup or so of vanilla yogurt and just enough water (or orange juice) so it would help it blend, put on the lid and turned it on the lowest setting.  Check out how nicely it was mixing together:
 If you find that your smoothie is grinding but nothing seems to be blending together, then put in a little more liquid.  This will help the solid ingredients get pulled downward so they will get chopped up.  I like to blend mine until the vortex has appeared in the middle and the top starts bubbling.  (This way, it will get chopped up nicely and I won't have too much stuff to chew.)

Ta-Da!  All blended together and green!
 Most of the time I somehow gauge it just right where it all fits perfectly in a tall glass.  This time, I poured it in a glass that has a couple green dots and even used a green straw so you could see just how green this smoothie is.  I didn't even try the drip that dove off the side of the blender as I was pouring it.  I waited until it was all perfectly in the glass to try the very first taste.  I was pleasantly surprised.  The banana (and whatever other fruit you happen to add) out does the flavor of the veggies you put in the smoothie, so I could mostly only taste the banana!  Fruit also has natural sugar, so you don't have to add any extra sugar or sugar substitute to make it taste sweet.  Fruit smoothies taste sweet all on their own.

Sooo..if you happen to have a blender that's been sitting around unused for a while, bring it out, dust it off and try your hand at your own green smoothie!  I would LOVE to hear about how yours turns out!

Friday, April 5, 2013

Hair .... and Headbands!

You know how in an earlier post I showed you the first doll I had made?  (You can see her HERE.)  Well, I am currently working on my next doll, and she is COMPLETELY different from Sleepy Sarah.  She is going to have both arms and legs, as well as ........ HAIR.  Yes, I know I'm using too many caps, but this is big for me.  I have NEVER done hair.  I've crocheted her head and one of her legs so far, and I'm excited to find out how she turns out.  Maybe when it gets a little lighter outside (yes, I'm up before dawn today) I'll take pictures of what I've finished so far so you can see. 

Until then, I want to show you another project I already have finished: headbands!
This is the Crochet Cluster V-Stitch Headband by Sara over at My Merry Messy Life.


Above is the adult-sized headband.  Below is the baby-sized head band.  Make sure when you are making yours to make it a little tight for your head because it WILL stretch out.  You don't want it stretching out so much that it falls off your head.
 So, if you are so inclined, you and your baby can match.  :)
You can find the pattern for these headbands HERE.  She has tons of other patterns for headbands if you don't want to try out the V-stitch for this one.  The rose is super simple, so you can make it for any band you fancy, really.  I really liked the look of these, and I wanted to try a brand new stitch so I gave it a go.  I like how they turned out!

Tuesday, April 2, 2013

Lots of colors

I have a new Amigurumi to share with you!!

Mine looks a bit different from Dusti's over at her blog, Sheep of Delight, where you can find the pattern HERE, but that's because all creators are different.  I chose the yarn before I knew what I was going to make with it.  I had been eying the multicolored skeins in the baby section for quite awhile (they are just so soft!), but they are usually more expensive than a not-so-soft, but bigger, skein.  One fortunate day I was perusing my usual A. C. Moore store's yarn section and oh my goodness they had a great sale on them.  Not just a dollar off sale, mind you.  A more-than-50%-off sale.  So, I of course bought three! 

Are you ready??  Okay!  First, I will show you what she looked like when I almost had her complete:
Kind of crazy looking with all that yarn sticking out, huh?  And, no, she doesn't have a face yet.  I like to add my face at the very end when I can see exactly where I need to place the eyes, nose and/or mouth.  Like I said, every creator is different! :) 

Have you figured out yet what she could be?

The tail was a vital part in getting her to sit up on her own:

 She's no bigger than my hand!

She is.....Happy Hippo!  Isn't she darling?  You should really visit the blog where I found this pattern.  She has a few other great patterns that I may just have to try out! 

Monday, April 1, 2013

Easter Candy ~ Sales

 Every holiday, stores come out with cute themed products like the foot tall bunny cookie pan shown above. 
Every holiday, stores make those cute products way more than you want to spend on them.....or you can just do what I like to do and wait until the day after the holiday to buy most of what I wanted for 50% off the original price.  If you have also been keeping coupons from past inserts, you can also save even more!  I'm new to the whole use-a-coupon-for-everything trend, so I didn't have any valid coupons for these, but I did shop around to find the best deal.  Here are just a few of the candies I found:

14 ounces of Sixlets (Hubby LOVES these): originally $2.88, bought for half off.
 Baby Bottle Pops (Stores like to sell them individually at the counter for the price I got for all three today): originally $2.88, bought for half off.
 10.8 ounces of Reese's Peanut Butter Eggs (!!!): originally $2.88, bought for half off, but let me tell you a little about this.  Many of you who love chocolate and peanut butter as much as I do will eye the BIG Reese's peanut butter egg that comes one per container and it will be just a little more expensive than this (I price checked the sale price on it at $2), but DO NOT BE FOOLED!!  That egg is only 6 or 7 ounces!  If you get this bag with a bunch of smaller eggs, not only will you be paying less, but you will also get over 3 more ounces of chocolately peanut buttery goodness.  Plus, as an added bonus, these are individually wrapped so you don't have to worry about trying to stash your already opened one big egg away if you don't happen to eat the entire thing in one sitting.  Sure, this may use more wrappers, but you can throw a couple in your lunch box or enjoy one (or five!) at a time while you relax at home during the evening.  Yum :)
Now, one more piece of advice that I MUST share with you: each store not only will have different percentages off the same exact candies, but these candies will also be priced differently at each store. 

First, I went to Target.  They opened at 8AM..I got there at 8:10.  The signs were up and said 30% off, but most of the shelves looked like a tornado had went through.  Since Target is closed on Easter, this was probably due to people swarming in at the last minute getting gifts for those baskets they just have to have from the Easter bunny for their kids.  While I stood there, however, around eight employees came by, got excited by the sale, then immediately began to restock the shelves.  That's great, but I was hoping for a higher percentage off and I felt in the way, so I left for another store to compare prices. 

Second was Walmart.  Now, I don't frequent Walmart, but going in there today paid off.  (Except for the fact that some lady got the last bag of M&Ms because Walmart is open on Easter, so those must have went fast. Sad, because I really wanted those.  Hopefully, Target's prices will drop even more and there will still be M&Ms left for me to get in a few days.)  Walmart had 50% off all of their Easter candy and supplies, so the pictures you see above are all from Walmart.  Remember to always price check items yourself if there is one available so you don't inconvenience the clerks.

Third I stopped by Dollar Tree just because if was on the way home and I was curious.  Sure, they had candy 50% off (so 50 cents), but they were really small bags and were not any of the kinds I had found earlier.

Lastly I stopped by CVS.  Wow.  They didn't even have sale prices up, and it was already almost 10AM.  Even worse, there M&Ms were over $4!!!  The same exact kinds and sizes had been at Target with the sale price (only 30% off) making them under $3. 

It will be interesting to see which stores have the best deals in the end when (and if) they have anything left later on, but the initial best deal out of the four was Walmart.

Friday, March 29, 2013

Busch Gardens

 Griffon = Scariest. Coaster. Ever.

I may be exaggerating here, but really - I was shaking even after I got off of this coaster, and I didn't even sit in the front row!  See that loop up there in the picture?  I know it's a little hard to see with the sun, but there are people up there....just hanging there.  They're not upside down or anything, but as part of the ride you do just dangle at the tippy top before it curves inward and then down.  So, instead of just going down the hill like the average coaster, this one likes to scare you a little more.  If you are an adventure seeker, then I highly recommend this for you.  If you are scared of heights, you should probably stay on the ground and watch as your friends brave this heart racing ride!

Here's a ride a little more up the easy going rider's ally:
This is Apollo's Chariot.  I was in the front row, and it's a pretty easy going coaster.  Case in point: there was a seven year old beside me throwing up her arms as we rounded turns and went down hills.  If you're more into an old school type coaster, this is the one for you. 

There are three other roller coasters at this park: Alpengeist, Loch Ness Monster and Verbolten.  Verbolten is the newest one that replaced Big Bad Wolf (don't worry, it jerked riders around for 25 years), and it has some surprises in store for you during the ride.  I won't spoil it, but it was super fun!

Can you tell why there wasn't a post yesterday?  I was out making some memories to share with all of you.  :)  How many of you have been to Busch Gardens?

Wednesday, March 27, 2013

Puppy with Big Ears

 Perky Puppy by Emily: Pattern can be found HERE.
This is the second Amigurumi I have ever made, and it was somewhat ambitious.  Of course since I had never made one before that had to be pieced together, this step was brand new to me.  When I had all the pieces crocheted and was ready to put him together, I thought there was NO WAY his head was going to fit on his body, especially with those huge ears.  Alas, after figuring out which way to put his head on, things actually starting working out.  Perky Puppy's head does not flop at all and he can even sit up on his own without toppling over.  I even added my own touch by incorporating the white on his paw, ear and rump.  All in all, he's a success!

Monday, March 25, 2013

Pikachu 3DS XL and a Crocheted Pokeball

As some of you may know, Nintendo came out with a Pikachu 3DS XL over the weekend.  It was a very limited edition, and I believe they only made like 50,000 of them.  I was in a few stores over the weekend (hubby is an avid gamer) only to find out that Best Buy didn't get any in, GameStop was only getting a few, and Target had the best deal out there - $40 below the price GameStop was asking.  No, we didn't get one, but Target's was a little tempting.  However, if you're in the market for a regular colored 3DS XL, Target's is still the best price among the three, except Best Buy will price match them.  If you want your Best Buy points, just tell them about Target's deal and they'll look it up and price match it for you.  Handy Dandy.

Along the lines of Pokemon, I have a pattern of Pokeball for you that you can find HERE.  Rose over at Tasty Crochet is very talented and is the author of Tasty Crochet: A Pantry Full of Patterns for 33 Yummy Treats.  Here is the Pokeball I created from her easy-to-follow pattern:
Hubby was very happy with this (I made it per his request because I needed something quick to whip up as a break from my longer projects), and proceeded to attempt to capture our dog.  Thankfully, our dog didn't think it was a toy and merely sniffed it instead of trying to chew on it.  If you're an avid gamer (or know someone who is), have fun with this project!

Saturday, March 23, 2013

Volunteering with a Twist

This morning hubby and I participated in a run as volunteers for the first time.  It was a fundraising run dedicated to students with disabilities.  It was fun to help out even if it was super early and a bit chilly out, and it was also really neat to see people running while pushing sports wheelchairs for children who couldn't run in the race themselves.  The children got to participate in the race because of this, and you should have seen their faces - priceless!  It was totally worth getting up at 6AM on a Saturday and putting on five top layers of clothes to witness.  If you ever get the chance to help out in this way, you should.  We did preregistration and got to check most of the runners and walkers in by giving them their t-shirts and bib numbers.  As a beginner runner, I benefited from seeing what goes on "behind the scenes".  If you're already a seasoned runner, I highly encourage you to do this some time instead of running in the race.  It will make you appreciate the people that give their time to help you succeed in reaching some of your goals and help you to realize that that medal couldn't be possible without their help, too (on top of all your training!).  I hope to do this again soon and in the meantime thank the next volunteers as I race to the finish.

Smalls, the Smooshy Bunny

I know it's LATE in the day (or early in the morning) for all of us on the East Coast, but I wanted to share another lovely with you.  This is the first animal I have ever crocheted.  I got the idea for him when I came across a picture on a blog of a little girl holding a bunny that her grandma had crocheted for her.  I have not been able to find that blog again since then, but I did use the ideal sphere patterns by Emily, which I found HERE, connected them together by moving on to a smaller sphere before finishing the bigger one, and used my own design for the ears.

So, I introduce to you: Smalls, the Smooshy Bunny:


He's cute, huh?  You may be wondering (like my hubby did) why he has no limbs.  Well, I think it shows off his posable ears better, and if a child ever gets hold of him, he's easy to keep in the crook of an elbow or "smooshed" in a small hand.  Hence, the "smooshy" bunny part.  He is rather small, but I think he's charming.

See you tomorrow :)

Thursday, March 21, 2013

Testing..1 2 3

Hello there!

My name is Lydia, and I am a beginner at crochet.  I taught myself through youtube videos and other tutorials online, and I ended up LOVING it so I started crocheting animals from patterns I found through Pinterest.  These animals are called Amigurumi.  After making a few different ones over the past couple months, I have just begun to experiment with designing my own.  I want to share with the original creators the lovelies I have made with their patterns, but I also wanted to have a place where I could share my designs when I create more of them.  What better way to find others who love crochet than through a blog?  So, here I go onto writing about crochet, and maybe I'll share some of the resources I used in order to learn in a later post as well. 

Okay, so I've only blogged a couple times a long time ago, but never really thought much of it.  However, after getting on Pinterest to find ideas for Amigurumi lovelies that I could make and being directed to different great blogs, I thought maybe I should start sharing my creations, too!  Be patient with me as I figure out how to link to other blogs and upload pictures of my lovelies.  :)

Over the next few days, I hope to share with you the first few lovelies I have ever crocheted.  

I'll start off with one of my favorites - Sleepy Sarah by Mia over at Owlishly.  You can find her free pattern HERE.  
 Isn't she great?
She's the first doll I have ever crocheted (and the only one so far!), and I think she turned out very nice.

I hope to make a doll that I create myself who can be the Anna Belle this blog is named after, but so far it will just have to be a name and I'll just use my cute puppy as the profile picture.  Thanks for stopping by!  Come back tomorrow for another Amigurumi!